


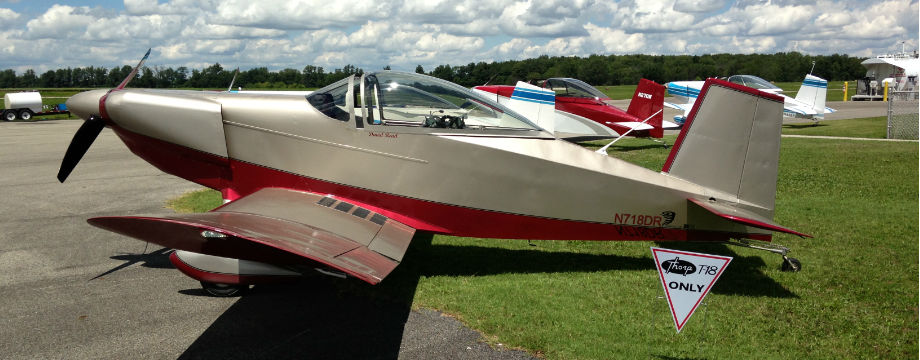


Inspection Items For a T-18 Purchaser
Below is a checklist put together by a Mutual Aid Society member. It is intended as a reference only and will be modified as seen fit. It is not intended to be all inclusive and is certainly no substitute for a thorough pre-purchase inspection by an A&P. As with any aircraft purchase you should go over the aircraft with a fin toothed comb. Since the T-18 is a homebuilt, many aircraft mechanics will not be familiar with it's particulars. The T-18 Mutual Aid Society has a list of Ambassadors available to help you. There is no one better to help answer questions or to supplement your pre-purchase inspection than someone who is knowledgeable about the design and has actually built one. To find someone in your area click the Thorp Ambassadors link.
- Look for creases or wrinkles in the wing skins for and aft of the main spar. Creases are evidence of possible high G - Loads. (Note: Many T-18's have these wrinkles. It is due, in part, to the lack of a compression member other than the skin between the front and aft ribs. This along with "working rivets", is not always an indicator of over "G". Severe wrinkles with signs of spar web deformation are cause for concern.)
- Check the nose rib rivets for looseness, or evidence of them working loose. The original drawings call for 12 rivets per nose rib on the upper and lower wing surface. John Thorp revised the drawings and added additional rivets. (Refer to item# 2 in the Other Revisions above)
- Check the aileron hinge area for evidence of cracking. Check that the hinges are not excessively worn and that the hinge pins are safety wired in place.
- Check for cracks in the landing gear A-Frame, particularly where the cross member is welded to the gear legs. Be aware that some completed Thorps have been found with landing gears that have not been heat treated. This is a dangerous condition that would need corrected immediately.
- Check the rudder pedals and brakes hitting on the fuel tank supports. Some builders have found it difficult to apply the brake with full right rudder deflection. There are some modifications that deal with this problem. ( refer to Other Revisions Item# 7)
- Check for chafing on the fuel tank. At least one builder found his tank worn thin where something was rubbing.
- Check for the aileron counter balance weights hitting the underside of the wingtip, on any of the wingtip fasteners, or wing skin. If interference is found then appropiate action to remedy the problem is in order.
- Check the bolts and rudder fittings where the rudder cables attach at the rudder. Normal wear can cause these to become dangerously thin.
- First you need to insure that the first four of the Mandatory SDR's listed above are complied with. Next check the horizontal tail assembly for bushing wear. Holding the stabilator at the tip, move it both vertically and horizontally paying attention to the amount of movement present. If there is more that 3/16" or so movement then the bushings will likely need replaced. The anti-servo tab should also be checked for looseness .. holding the stabilator solid, the anti-servo tabs should not have excess slop or movement. Slop in the anti-servo tabs can occur due to wear in the jackscrew assembly which is responsible for pitch trim. Any slop in the tail assembly is cause for concern. The condition must be investigated and remedied.
- Check the rudder attach points and the pivot bushing for excessive wear. If the bushings are worn they will need replaced.
- Check the stabilator push pull tube, its attach hardware, and the bushings. If any of these show looseness or wear, correct the problem.
- Check the walking beam, its mounting hardware, and the bushings for wear. There should be little free play in the stick sockets and none in the push rod connection points for the ailerons and stabilator. Insure that the stick travel limit stops are in place and adjusted properly.
- Some builders have drilled a hole in the stick tube just above the stick socket to route the trim and/or push to talk switch wiring. This has found to be a high stress area and the stick tube can crack and break at this point. Inspect this area and if cracks are found the stick tube must be replaced. It has been found that it is preferable to drill the hole in the bottom of the machined stick socket for the wire routing. If you must route the wiring through the stick tube the hole must be much higher up the tube (like maybe 6" above the socket).
- Check the rudder pedal attach points and the rudder cable attachment to the pedals. If the rudder cables are center mounted then insure that they are not rubbing anywhere on the tunnel. Sometimes builders run wiring through the tunnel .. if this is so then also insure that the rudder cables are not chafing on any wires.
- Check the flaps, mounting hardware, and pivot bushings for wear. If there is excess play in the bushings then they will need replaced. Check the flap cables and their attachment. If the airplane has manual flaps then check the flap handle and detent for proper operation and excessive wear.
- The tail wheel is an item of major concern. There have been accidents during takeoff and landing caused by loss of directional control. This is usually due to the tail wheel locking mechanism being excessively worn, causing the assemble not to lock at all. When this happens you essentially have a full swiveling tail wheel, which does not work to well on the Thorp. No matter what brand of tail wheel is on the airplane inspect it thoroughly and if anything doesn't look or feel right …. fix it !!
- The Maule type tail wheel has had a couple of cases where the fork assembly has broken off completely. Inspect the Maule fork assembly for cracks and look for anything that just doesn't look right. Recently Lyle Trusty designed a new round tapered rod tail spring for the Thorp. This spring is a little longer and has a rebound rate that more closely matched the main gear. Lyle's design uses a modified Scott tail wheel assemble, but several other brands are being used as well. The new spring design can be retrofitted to existing Thorps.